On February 6th and 7th, we received training for our 3D Systems ProJet 660Pro printer. Training included not only how to set up and complete a print using the software, but also essential steps such as the cleaning of the machine that is required after the conclusion of each print.
After completing the necessary setup, calibration, and print head alignment, we performed our first test print, using a scan of a small bone comb that had been completed using Sustainable Archaeology's white light 3D digitizers. To test the process of positioning objects in the build envelope using the software, we printed three copies of the same object.
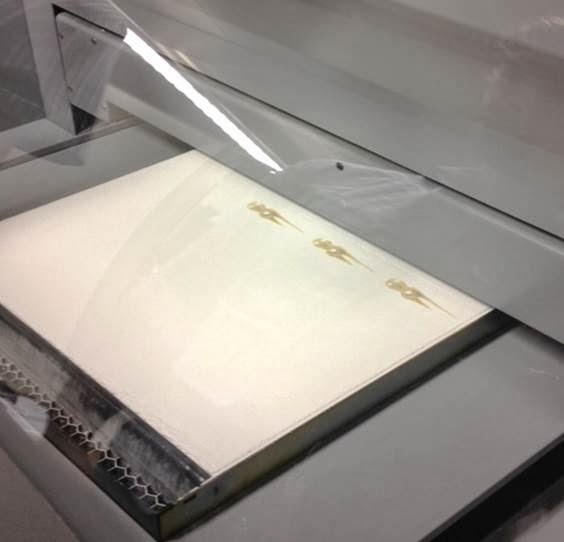 |
| Printing in progress. |
After a print is completed, the parts must be carefully excavated from the excess powder in the build envelope. The parts are quite delicate prior to any post-processing treatment, and can easily be broken during removal from the powder. Our objects were particularly delicate, as to maximize our training time, we did not allow for the usual one to two hours of drying time generally recommended between the conclusion of the printing process and the start of post-processing.
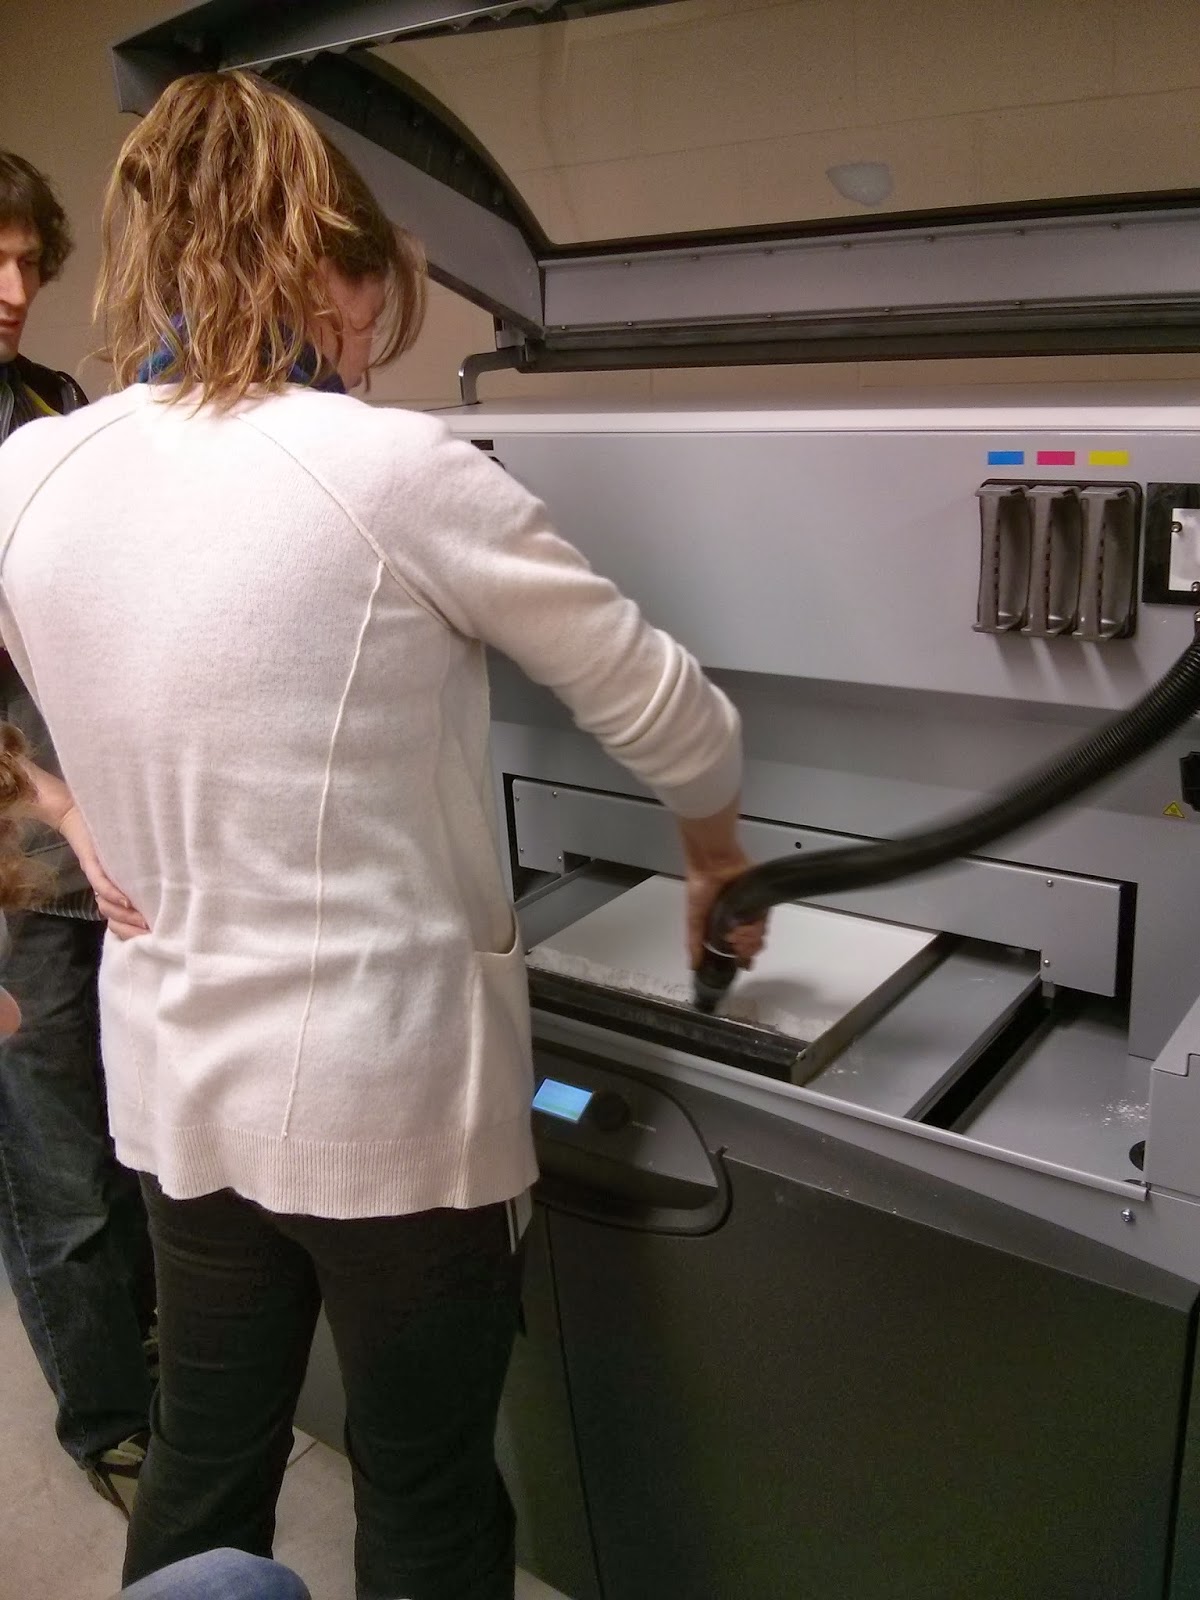 |
| Excavating the prints |
For our first test, we experimented with one of the available post-processing techniques, which is infiltration using a solution of Epsom salts and water. We plan to experiment further in the coming weeks to determine what scanning procedures produce the best files for printing, and to determine what post-processing techniques will produce the best colour replication.
 |
| Front and back views of the completed print |
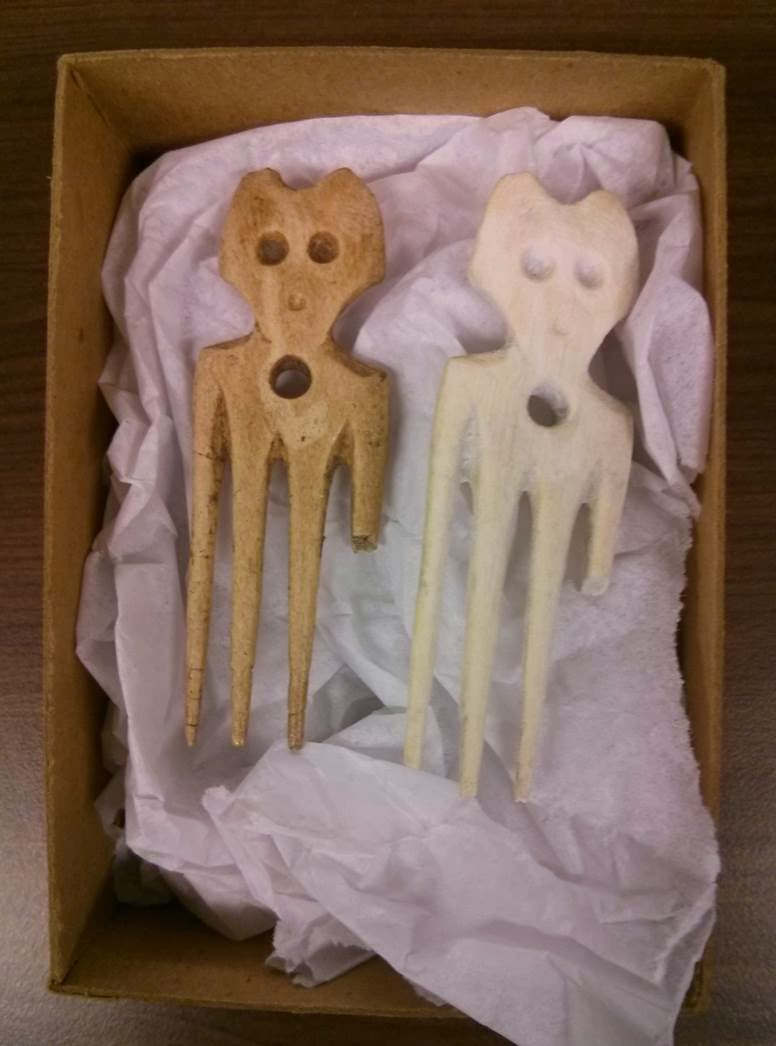 |
| The final print (right) and the original object |